Buffer Unveils "Insights," A Reimagined Analytics Platform Empowering Marketers to Be Data-Informed, Not Data-Driven
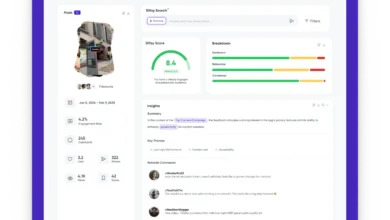
Buffer, a leading social media management platform, today announced the official launch of "Insights," a completely rebuilt analytics suite designed to empower marketers, content creators, and agencies with actionable data to inform their strategies. This significant overhaul marks a pivotal shift in how Buffer approaches social media analytics, moving away from merely presenting raw metrics to providing clear guidance on "what to do next." The initiative, which has been a long-standing aspiration for the company, aims to bridge the gap between complex data and practical application, ensuring that creativity remains at the forefront of content strategy while being strategically guided by performance.
The Evolution of Social Media Analytics and Buffer’s Vision
The digital marketing landscape has undergone a profound transformation over the past decade. What began as simple engagement metrics has evolved into a sophisticated ecosystem demanding deep analytical capabilities. However, many marketers, particularly those operating solo or within small teams, have often found themselves at a crossroads: either relying on basic, often insufficient, data from native platforms or investing in expensive, overly complex enterprise solutions that generate reams of data without offering clear, actionable takeaways. This dilemma has fueled a philosophical debate within the industry about the role of data – whether it should dictate strategy (data-driven) or inform and enhance human creativity (data-informed).
Buffer’s new "Insights" platform is firmly rooted in the latter philosophy. A spokesperson for Buffer elaborated on this vision, stating, "We recognize that originality and creativity are paramount in cutting through the noise online. Data, on its own, doesn’t create compelling content. But it can be an invaluable compass, pointing creators and marketers in the most promising directions." This perspective underscores a commitment to augmenting, rather than replacing, human ingenuity with intelligent data interpretation. The rebuilding effort, undertaken from the ground up, represents a substantial investment in research and development, reflecting Buffer’s dedication to solving a core pain point for its diverse user base.
Key Pillars of the New Insights Platform
Insights is structured around several core differentiators, each meticulously designed to address the aforementioned challenges in social media analytics:
1. Insights for Everyone, for Free: Democratizing Actionable Data

A cornerstone of the "Insights" launch is its commitment to accessibility. Buffer is offering powerful, actionable insights on its free plan, a strategic move that significantly democratizes access to advanced analytics. This decision positions Buffer as a strong advocate for solo creators, small businesses, and burgeoning brands who might otherwise be priced out of comprehensive analytics tools. The platform is designed to scale seamlessly, catering to individual users managing a single social channel as well as large agencies overseeing dozens of client brands.
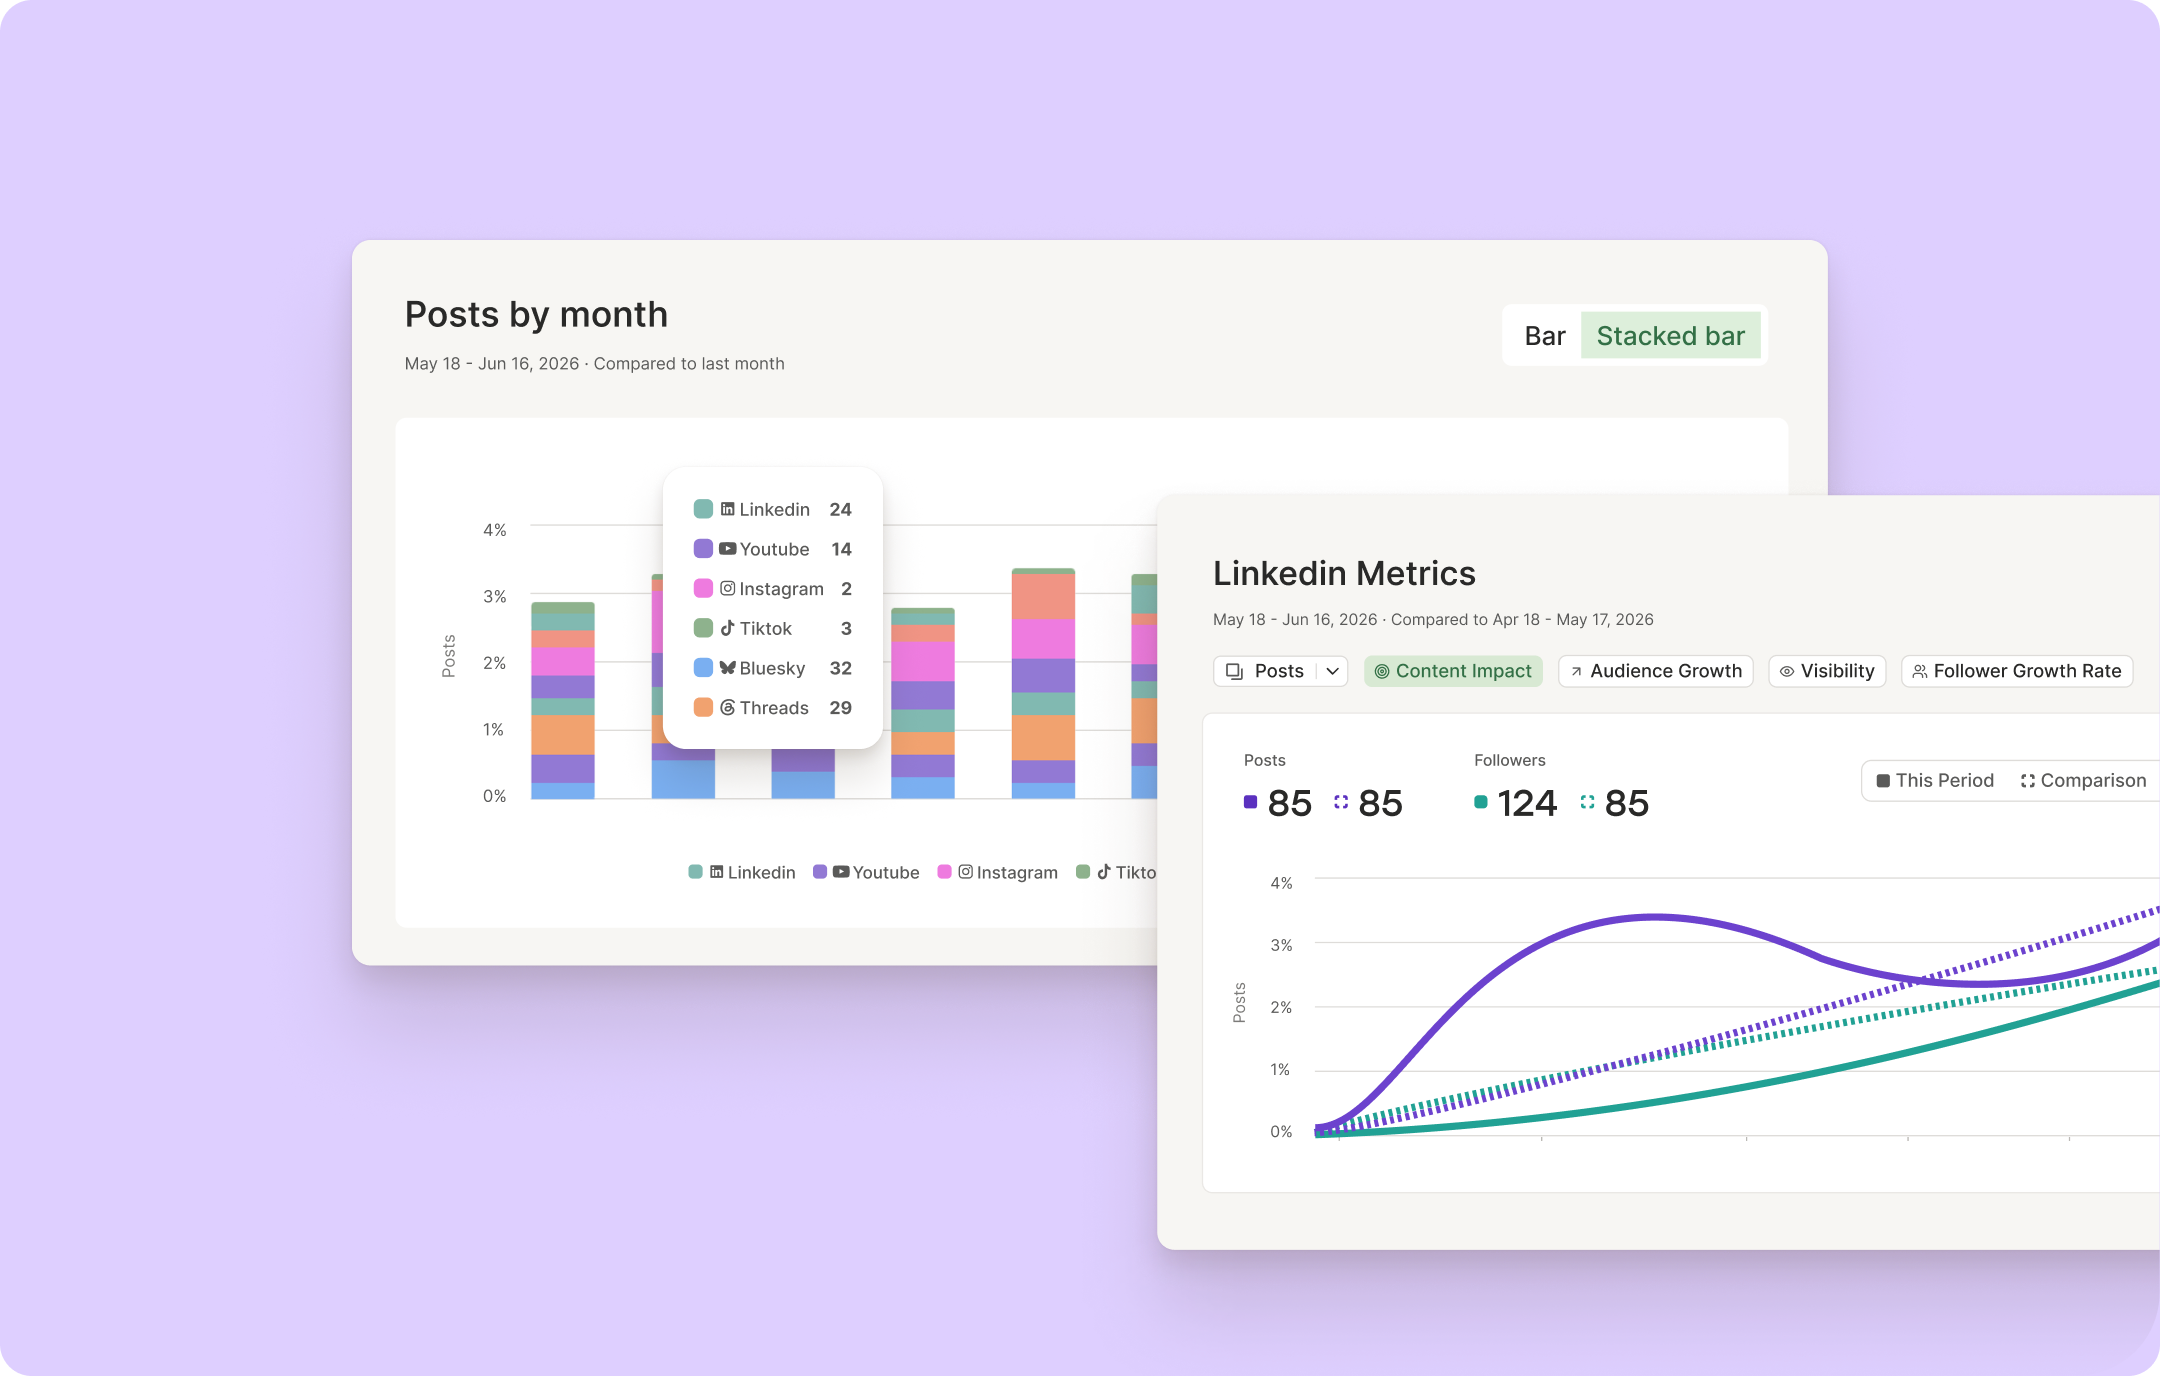
Historically, the social analytics market has seen a stark divide: free tools offering superficial data or premium platforms with extensive, often overwhelming, feature sets. Insights aims to disrupt this by providing a robust free tier that offers genuine value, including performance metrics, audience engagement trends, and content recommendations. For users requiring more granular detail, deeper reporting capabilities, and advanced features, paid plans are available, ensuring scalability without compromising the foundational value proposition of the free offering. This tiered approach reflects a deep understanding of market needs, providing a low barrier to entry while accommodating professional growth and increasing data demands.
2. Your Data, Wherever You Want It: The Power of Openness and Integration
In an increasingly interconnected digital ecosystem, data portability and integration are no longer luxuries but necessities. Buffer has strategically addressed this by designing Insights to work seamlessly with a broader marketing technology stack. The recent launch of Buffer’s public API and an MCP (Message Control Protocol) server empowers users to extract and utilize their social media data in ways previously unavailable.
This commitment to openness means that data collected by Insights is not "trapped" within Buffer’s dashboard. Marketers can now effortlessly pull their performance metrics into custom dashboards, CRM systems, business intelligence tools, or even hand them directly to AI agents for advanced processing and automated reporting. This level of interoperability is critical for businesses that rely on a holistic view of their marketing efforts, allowing for cross-channel analysis, integration with sales data, and more sophisticated reporting workflows. The ability to query data via API unlocks a new realm of possibilities for developers and data scientists looking to build custom applications or integrate Buffer’s analytics into proprietary systems.
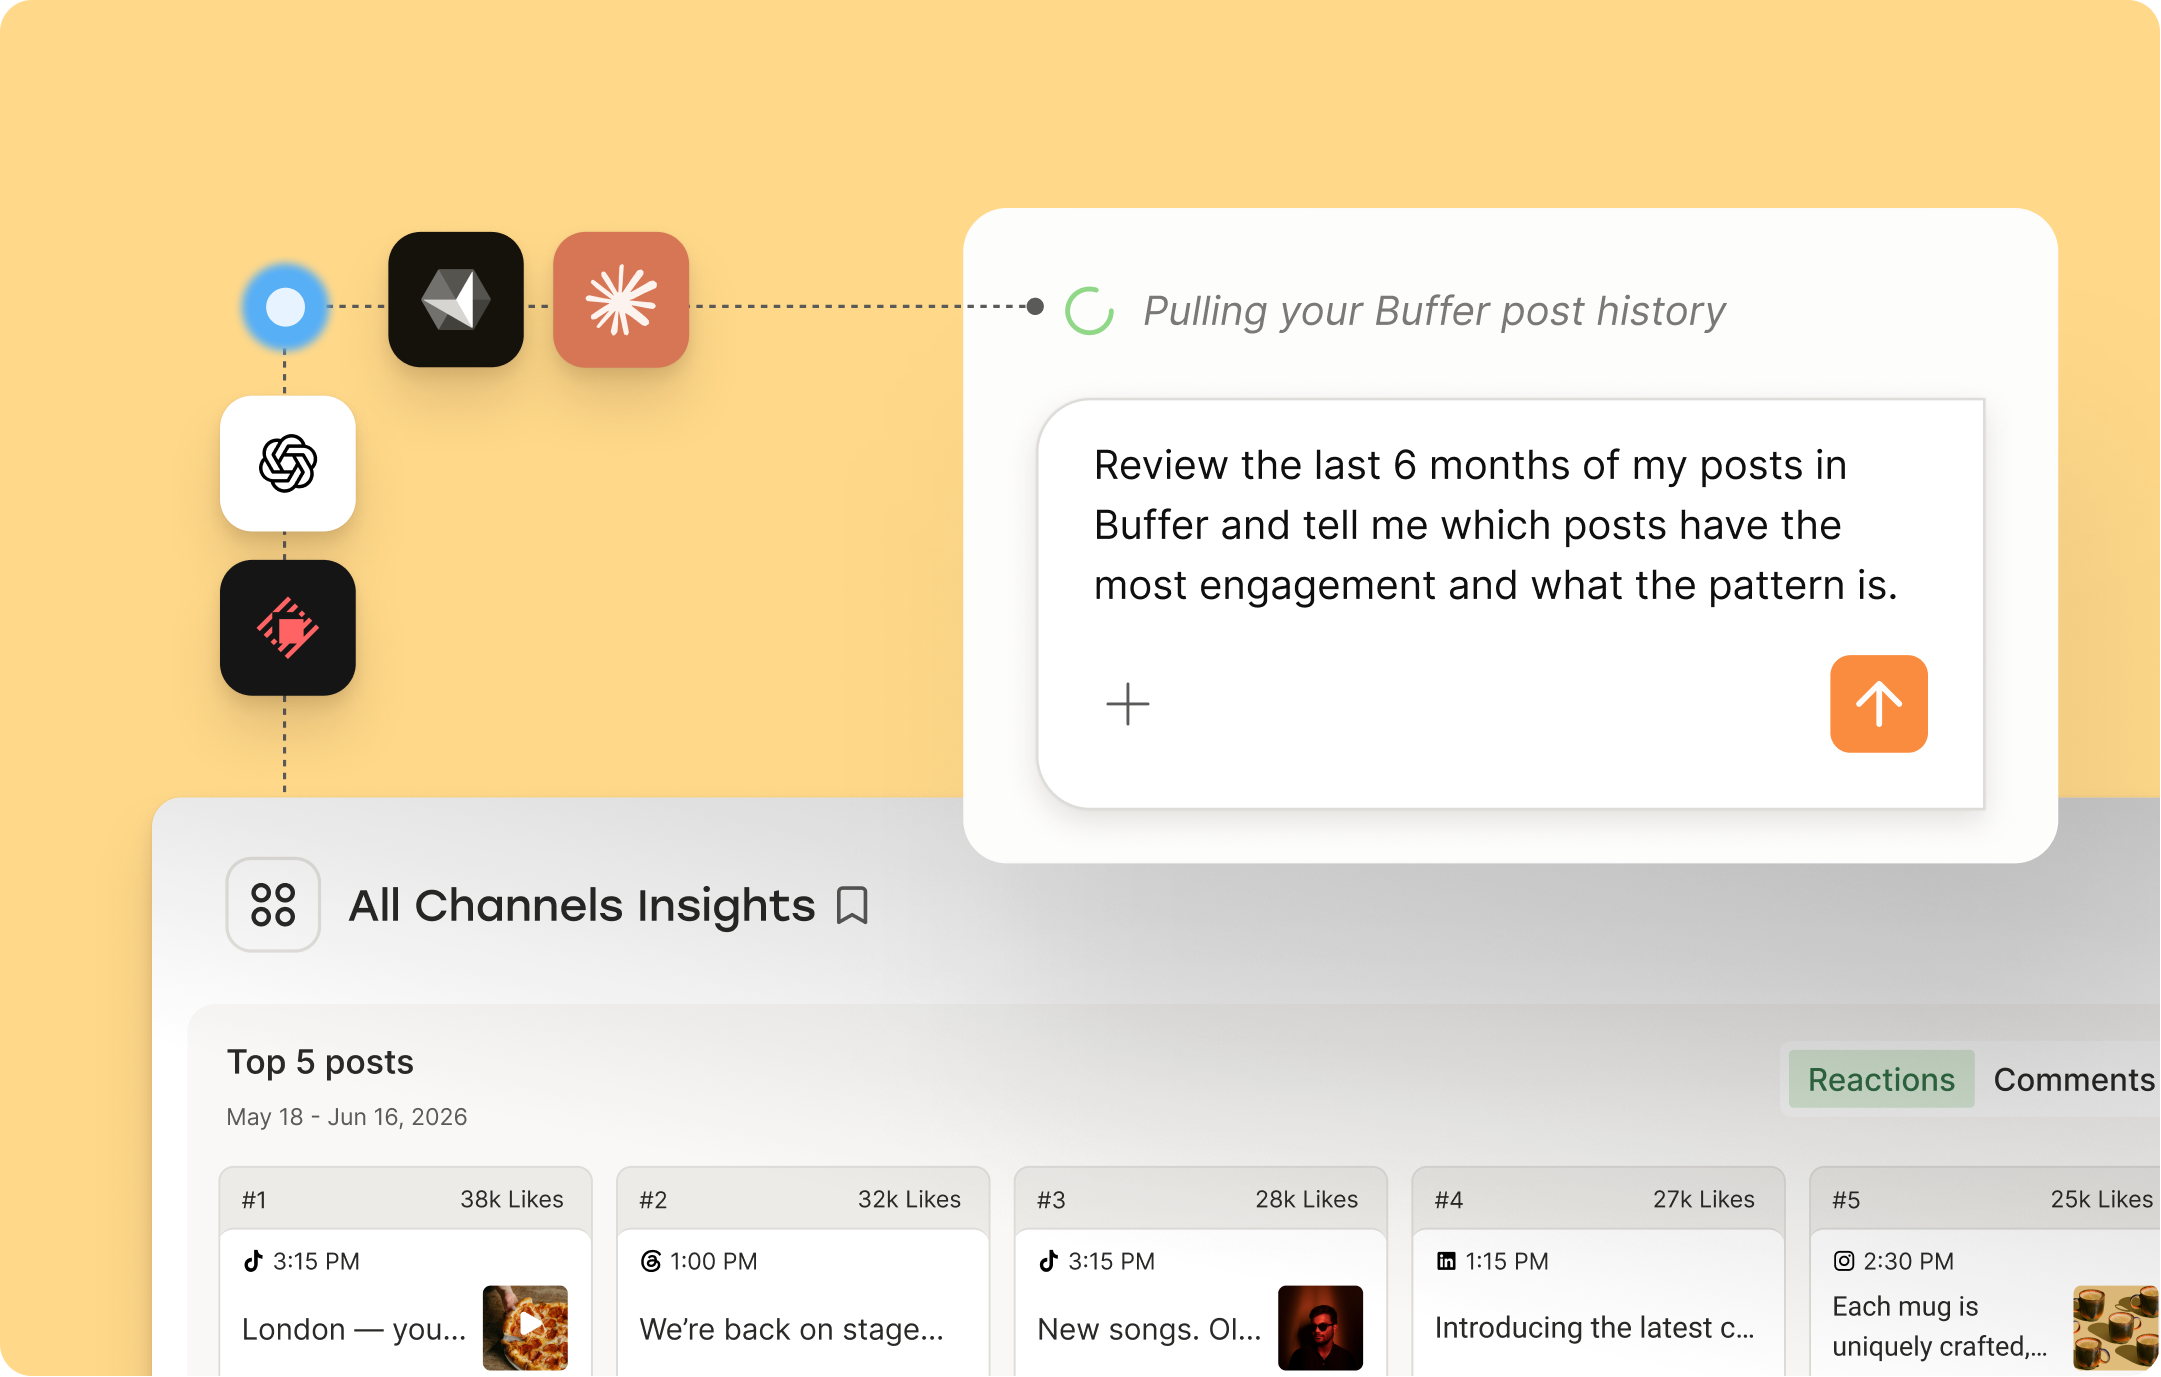
3. AI That Works in the Background: Elevating Human Creativity
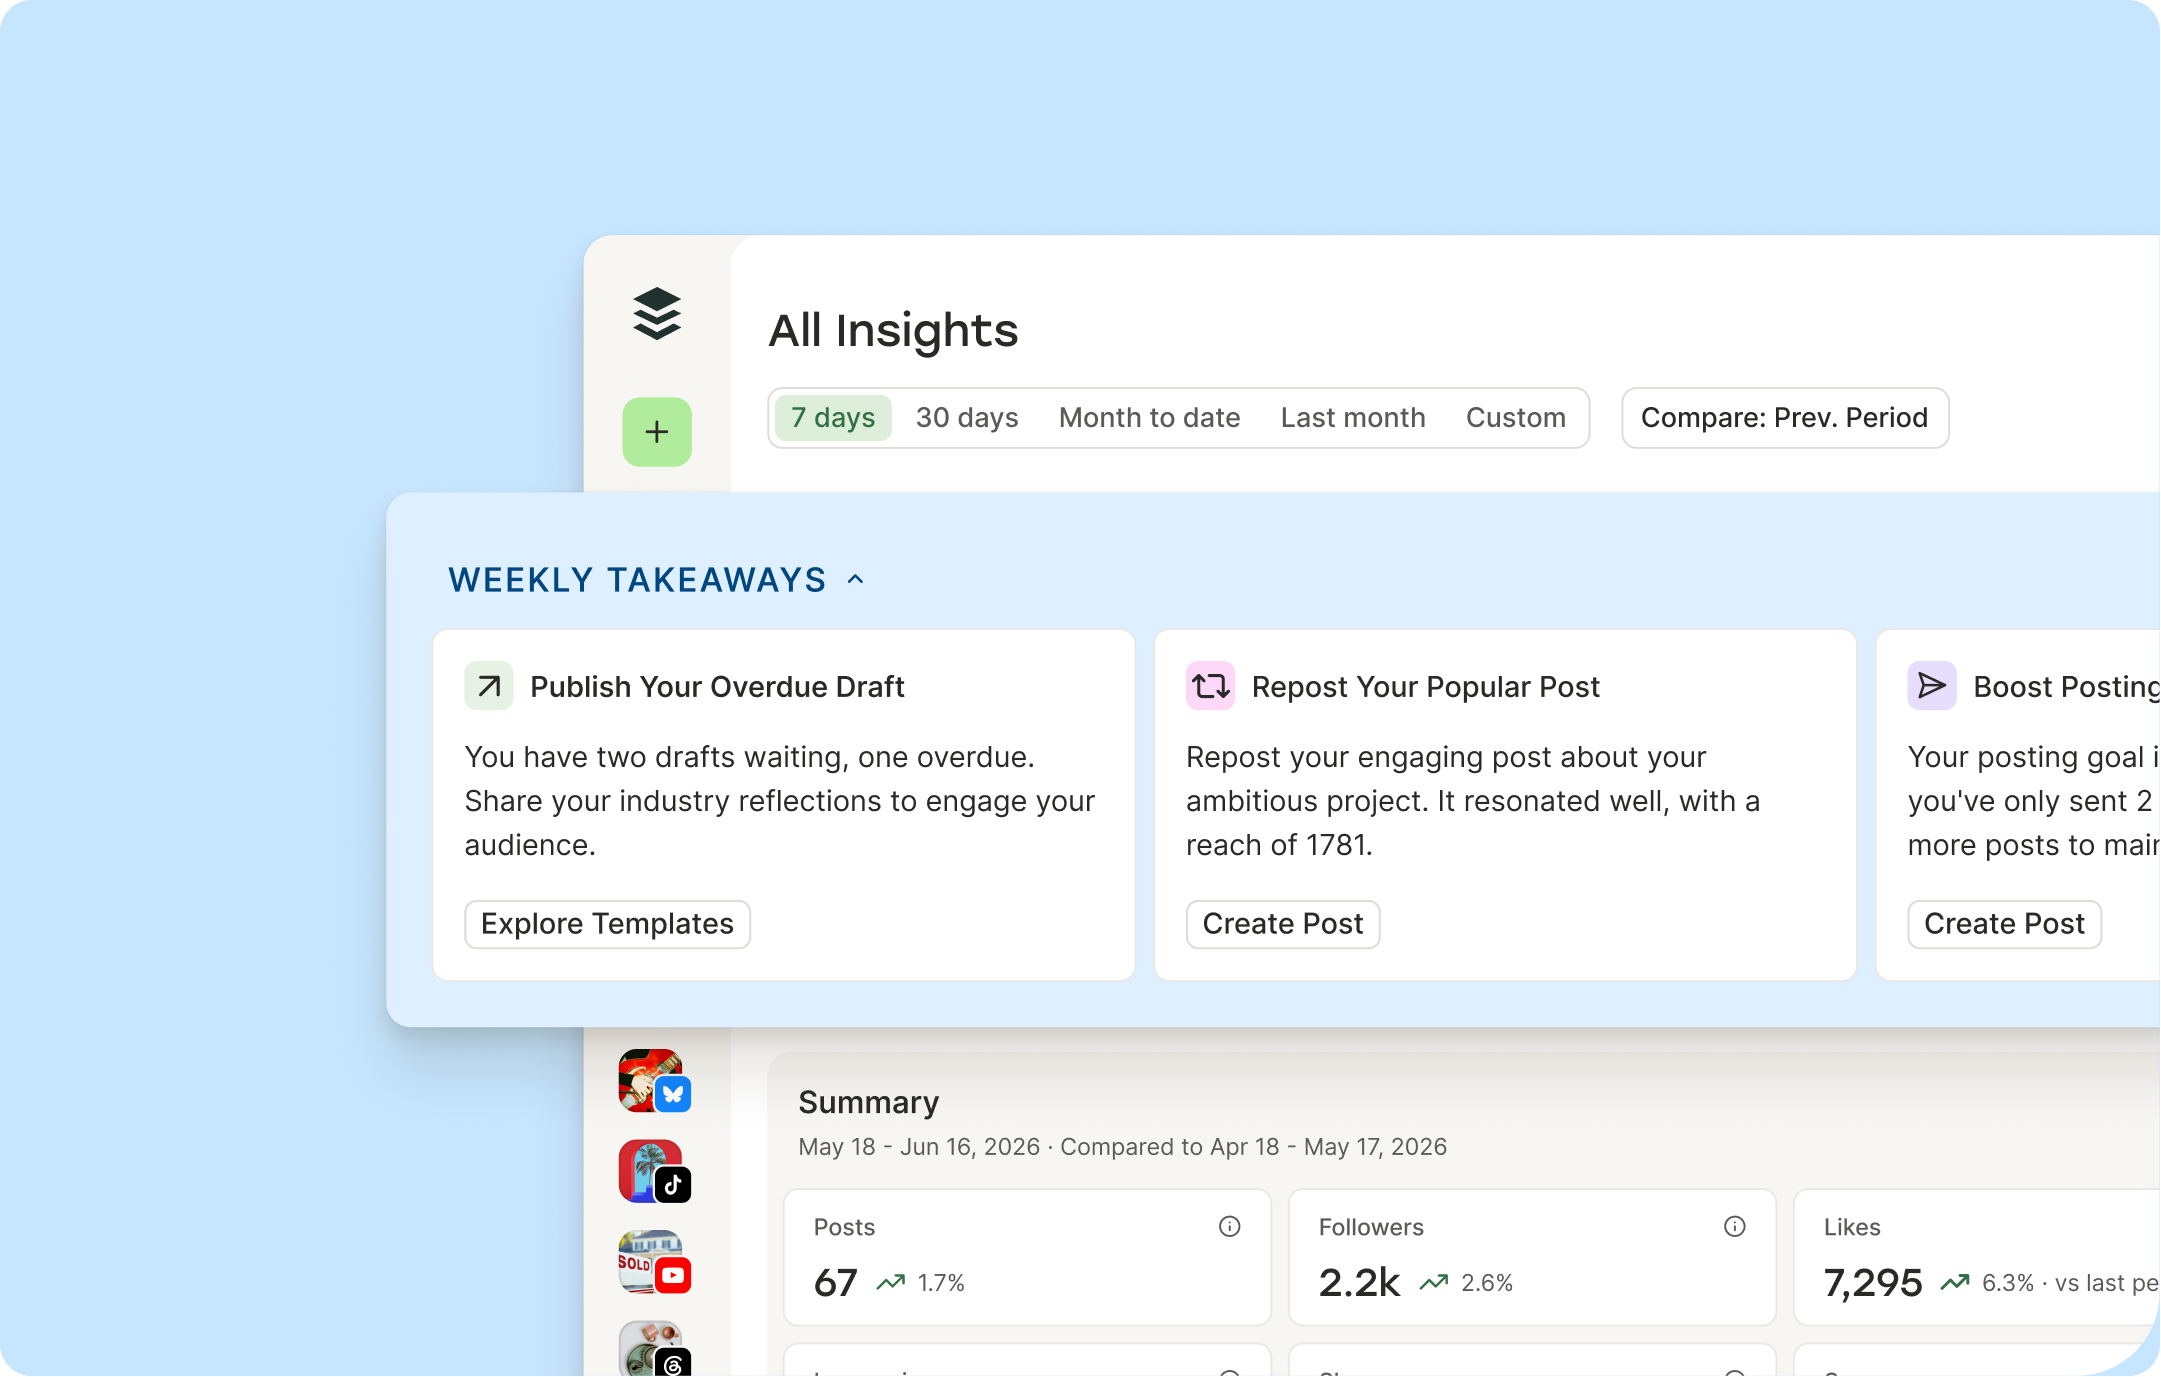
Artificial intelligence is rapidly reshaping the marketing landscape, but its application in content creation and analytics remains a nuanced area. Buffer’s integration of AI into Insights is carefully calibrated to assist rather than replace human creativity. The AI functions as an intelligent assistant, silently analyzing what’s performing well across a user’s social channels. Instead of generating content, it provides smart recommendations and highlights trends, effectively "pointing your own creativity in the right direction."
For example, the AI might identify specific content formats, topics, or posting times that consistently resonate with an audience, based on historical performance data. This allows marketers to make informed decisions about their next campaign, refining their creative approach with data-backed confidence. This symbiotic relationship between AI and human intelligence is crucial. The AI handles the heavy lifting of data analysis, identifying patterns and opportunities, while the marketer retains control over the creative execution, ensuring brand voice and originality are maintained. This approach aims to make data less intimidating and more immediately useful, transforming abstract numbers into concrete, actionable suggestions.
4. A Partner You Can Trust: Ensuring Security and Future-Proofing
Data security and platform reliability are paramount in social media management. Buffer’s long-standing status as an official partner to major social media platforms, including Meta (Facebook, Instagram), LinkedIn, and X (formerly Twitter), provides users with a critical layer of trust and assurance. This official partnership status translates into two key benefits: enhanced account safety and immediate access to the latest platform features.
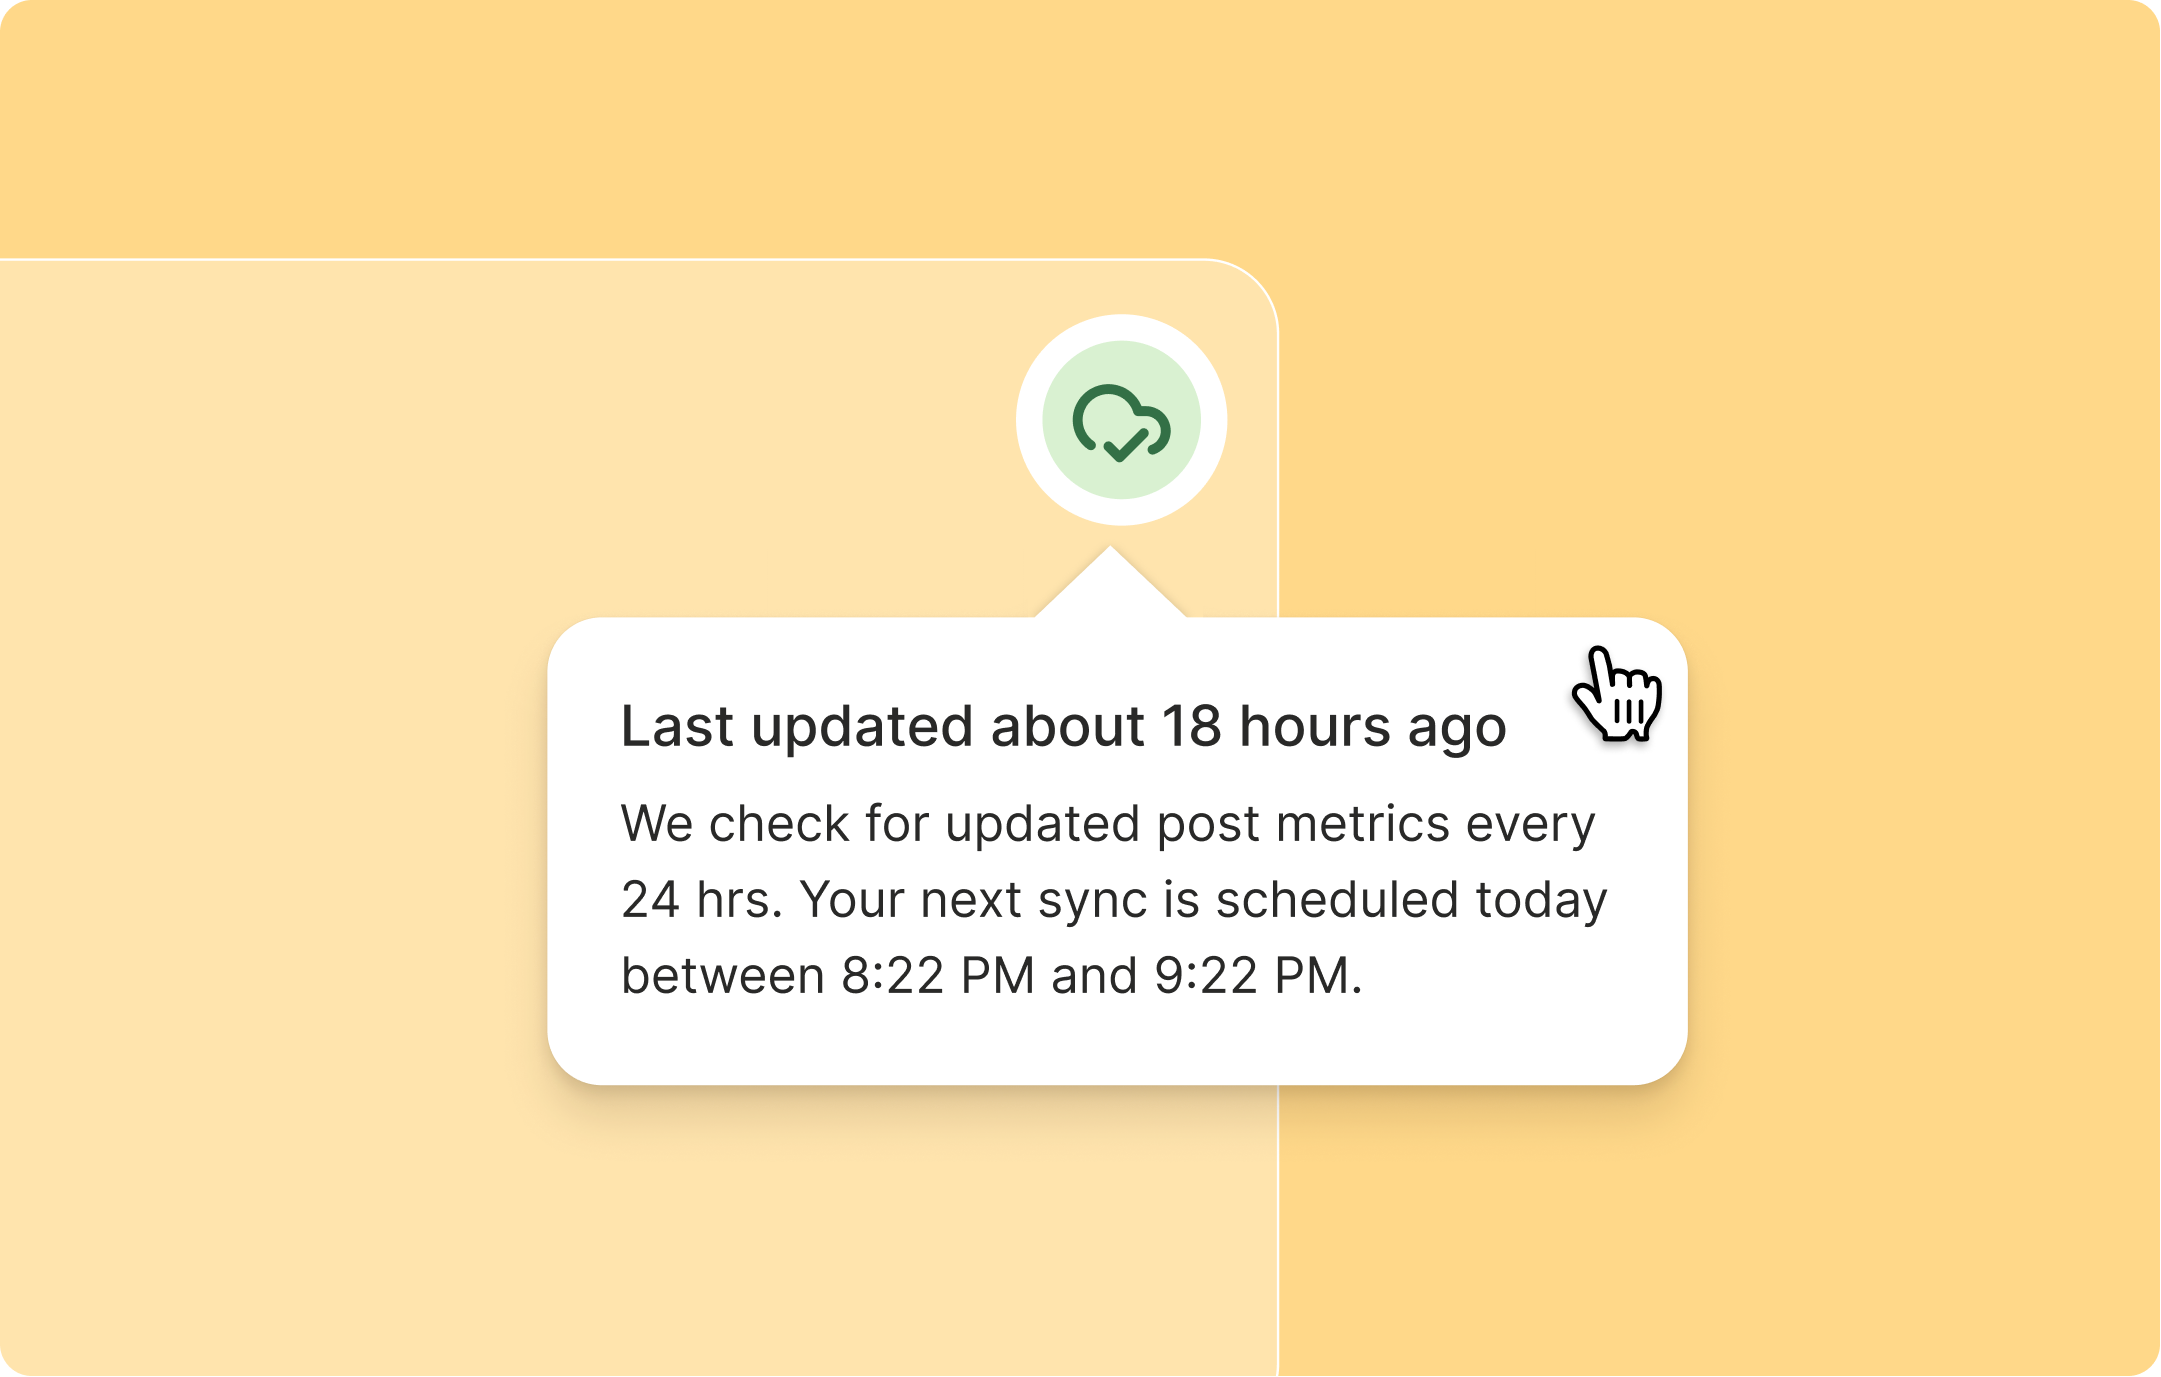
Official partnerships mean that Buffer’s integrations are built and maintained in accordance with the strict guidelines and security protocols of these social giants. This significantly reduces the risk of account compromise or data breaches, a constant concern for social media professionals. Furthermore, as social media platforms frequently update their APIs and introduce new features, official partners like Buffer are among the first to gain access, allowing them to integrate these changes into their services promptly. This ensures that Insights users always have access to the most current and comprehensive data, without experiencing service interruptions or delays in accessing new platform functionalities.
The Development Journey: Rebuilt from the Ground Up
The decision to rebuild Buffer’s analytics "from the ground up" was not taken lightly. It signifies a fundamental rethinking of how analytics should function in a modern marketing context. This extensive development process likely involved:
- Extensive User Research: Gathering feedback from existing Buffer users and the broader marketing community to understand their pain points, unmet needs, and desired functionalities.
- Technological Overhaul: Migrating to a more robust, scalable, and flexible infrastructure capable of handling vast amounts of data and supporting advanced analytical capabilities, including AI integration.
- Design-Centric Approach: Focusing on intuitive user experience (UX) and user interface (UI) design, ensuring that complex data is presented in a clear, digestible, and actionable format.
- Iterative Development: A phased approach to development, testing, and refinement, possibly involving beta programs with select users to fine-tune the platform before its public launch.
This comprehensive approach highlights Buffer’s commitment to delivering a truly differentiated and impactful product, moving beyond incremental updates to a complete transformation.
Broader Implications and Market Impact
The launch of Insights has several significant implications for Buffer and the wider social media analytics market:
- Competitive Positioning: Insights sharpens Buffer’s competitive edge against established players like Sprout Social, Hootsuite, and Agorapulse, particularly with its emphasis on actionable insights, AI integration, and a robust free tier. It positions Buffer as an innovator focused on practical outcomes rather than just data volume.
- Empowering the Mid-Market and SMBs: By offering powerful analytics for free and at competitive price points for paid tiers, Buffer is significantly empowering small and medium-sized businesses (SMBs) and individual creators who often lack the resources for enterprise-grade solutions. This could drive greater adoption of sophisticated social media strategies across a broader segment of the market.
- Shifting Industry Paradigms: Buffer’s "data-informed, not data-driven" mantra could influence how other platforms approach analytics, encouraging a focus on interpretability and actionable recommendations over sheer data presentation.
- Leveraging AI Responsibly: The responsible integration of AI, aimed at augmenting human capabilities rather than replacing them, sets a positive example for AI adoption in marketing tools. It addresses concerns about AI stifling creativity by framing it as a collaborative partner.
- Data Portability and Open Ecosystems: The strong emphasis on API access and data portability aligns with a growing industry trend towards open ecosystems, where users have greater control over their data and how it interacts with various tools. This could encourage other platforms to follow suit, fostering a more integrated and flexible marketing technology landscape.
Future Outlook
Insights is positioned as a foundational element for Buffer’s future growth and product roadmap. The platform’s modular design and open API suggest potential for continuous expansion, including:
- Deeper Cross-Channel Comparisons: While the initial launch likely focuses on individual channel insights, future iterations could offer more sophisticated cross-channel performance analysis, allowing brands to compare strategies across different social networks with greater ease.
- Advanced Reporting and Customization: Agencies, in particular, will benefit from increasingly sophisticated reporting templates, customizable dashboards, and white-label options.
- Predictive Analytics: As the AI models mature and gather more data, the platform could evolve to offer more robust predictive analytics, helping marketers anticipate future trends and optimize content before it’s even published.
- Integration with Broader Marketing Tools: Further integrations with email marketing platforms, CRM systems, and e-commerce platforms could provide an even more comprehensive view of the customer journey and marketing ROI.
In conclusion, Buffer’s "Insights" represents more than just a product update; it’s a strategic declaration about the future of social media analytics. By prioritizing actionable guidance, accessibility, openness, and the intelligent integration of AI, Buffer is aiming to equip a new generation of marketers and creators with the tools they need to navigate the complexities of the digital world, ensuring their content not only performs but also truly stands out. The platform is now live and available for users to explore at buffer.com/insights.


